Rhinestone Designs on Nails: Elevate Your Manicure with Sparkling Creativity
Nail art has evolved into a mesmerizing form of self-expression, offering countless ways to showcase your creativity and style. Among the various nail embellishments and techniques, rhinestone designs on nails have gained immense popularity for their ability to add glamour and elegance to your fingertips. In this article, we’ll explore the world of rhinestone nail designs, providing inspiration, application tips, and maintenance guidance to help you achieve dazzling and eye-catching nail art.
Unveiling the Beauty of Rhinestone Designs
Rhinestone designs on nails involve the strategic placement of small, glimmering rhinestones or crystals to create intricate patterns, accents, or focal points on your nails. These exquisite gems come in an array of sizes, shapes, and colors, making it possible to craft unique and personalized nail art that suits your style and occasion.
Design Ideas for Rhinestone Nails
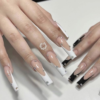
- Rhinestone French Tips: Give the classic French manicure a luxurious twist by replacing the white tips with a delicate line of rhinestones. This elegant design exudes sophistication and glamour.
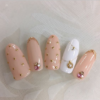
- Rhinestone Accent Nails: Create a captivating contrast by applying rhinestones to one or two accent nails while leaving the others with a complementary polish. This approach allows for subtle yet eye-catching nail art.
- Gradient Rhinestones: Craft a gradient effect by arranging rhinestones in a pattern that transitions from one color or size to another. This style adds depth and dimension to your manicure.
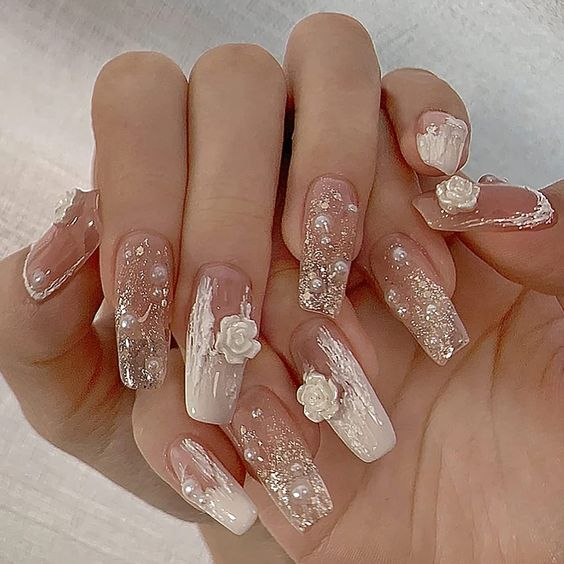
- Floral Rhinestone Art: Embrace nature-inspired elegance by arranging rhinestones into intricate flower patterns or delicate blossoms. These designs convey a sense of grace and beauty.
- Full Rhinestone Coverage: For a bold and opulent look, cover your entire nail surface with rhinestones. This glamorous style is perfect for special occasions when you want to make a striking statement.

How to Apply Rhinestone Designs on Nails
Achieving stunning rhinestone nail art is achievable with these simple steps:
Step 1: Prepare Your Nails: Start with clean, dry nails. Apply a base coat to create a smooth canvas for your rhinestones.
Step 2: Apply Adhesive: Use a specialized nail adhesive or clear nail glue to apply a small amount of adhesive to the area where you want to place the rhinestones.
Step 3: Place the Rhinestones: Gently pick up each rhinestone with a nail art tool or tweezers and place it onto the adhesive. Arrange the rhinestones according to your desired pattern.
Step 4: Seal with Top Coat: After all the rhinestones are in place, seal your design with a clear top coat. This not only adds shine but also ensures the rhinestones stay securely in place.
Tips for Maintaining Rhinestone Nail Designs
- Be cautious while using your hands to prevent rhinestones from dislodging.
- Avoid prolonged exposure to moisture, as it can weaken the adhesive.
- Apply cuticle oil or moisturizer to keep your cuticles and skin hydrated.
- If a rhinestone becomes loose, you can reattach it using a small drop of nail glue.
In conclusion, rhinestone designs on nails are a brilliant way to elevate your manicure with dazzling creativity. Whether you opt for a subtle accent or full-on bling, rhinestones empower you to express your individuality and style. With proper application and care, your rhinestone-adorned nails will shimmer and shine, captivating attention and leaving a lasting impression.